Next month our blog will be a detailed look at the process involved in using the Silhouette Curio.
Inklusionprint Blog May 2024
Print and Cut with the Silhouette Curio
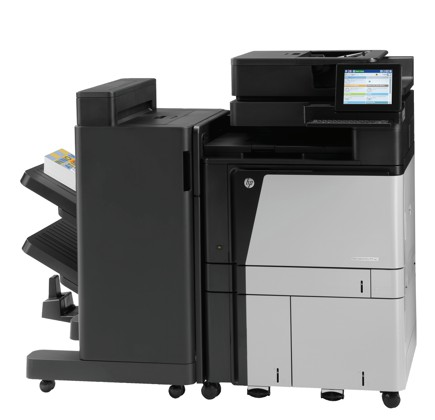
1. Import your graphic in the usual way. If it is your own drawing you can scan and email the image to yourself usingtheHPMFP880mPrinter.
2.If you are using an image you found online first make sure you are not infringing somebodies copyright.
3.All OK? Go ahead and download it to your desktop. From the right click menu choose open with Adobe Photoshop 2024.
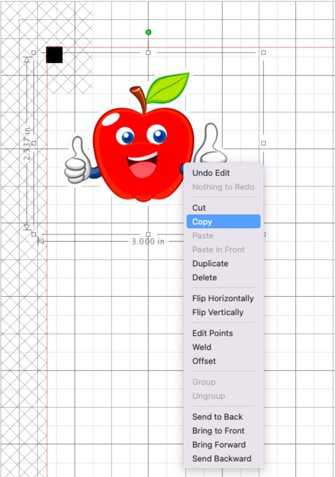
4.Edit the image where necessary and take away the background using the “Magic Erasure” tool. To make the cut image stand out, double click the image layer and the Effects Dialogue box will pop up. Tick the Stroke box and make a white stroke around the image between 10 and 20 pixels. Save a copy of it to your desktop as a .png.
5.Open the Silhouette program by clicking on this symbol in the task bar.
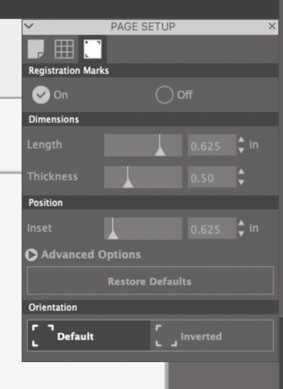
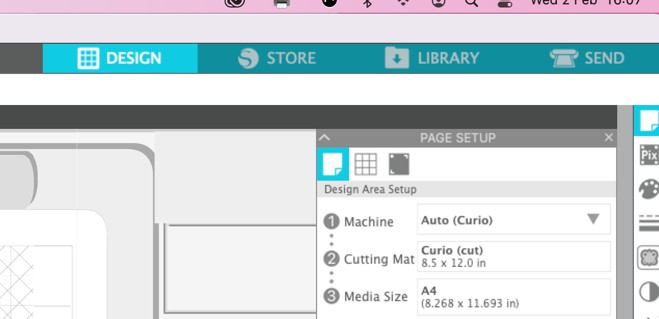
6. First thing to do is to make sure you have enabled the REGISTRAITION page. Like so…
7.Now, everything you place inside the rectangle with the thin red line will at the end be cut by the Curio.
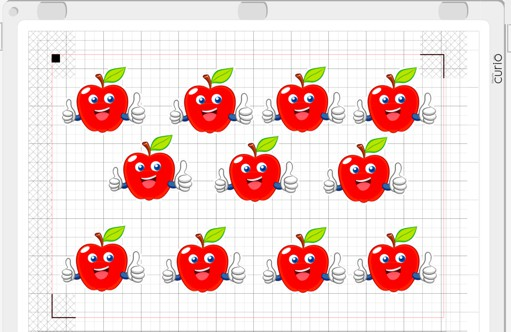
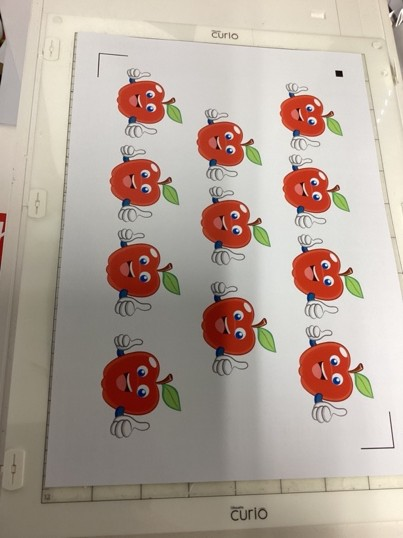
8.DragandDropyour.pngintotherectangleoftheSilhouettesoftware.Nextmakeas many copies of the image as you need to fill the page.
9. Makesureyouleaveenoughroombetweeneach imagesothattheyarenottouchingandtheknife can get between them.
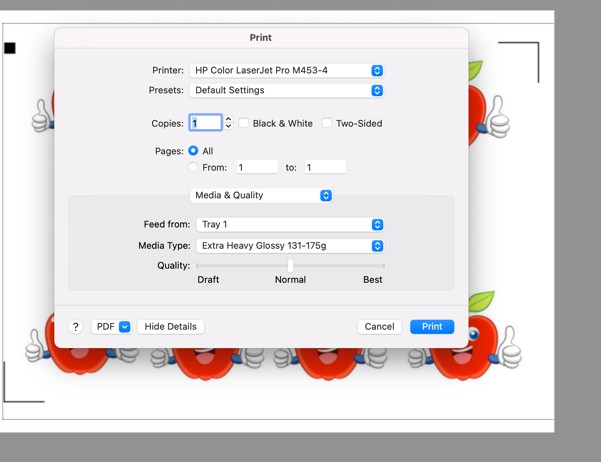
10. Goto“File>Print”andloadapieceofA4Photo paper.Click“Print” andchoosethe HP Color Laserjet Pro 454.
11. Choosethesesettingsforthe printer and click
“Print”.
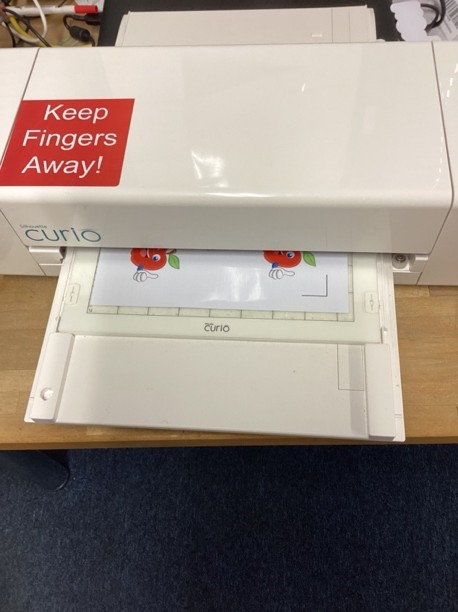
12, Place the print on the large cutting matt with the black square of the registration mark at the top right.
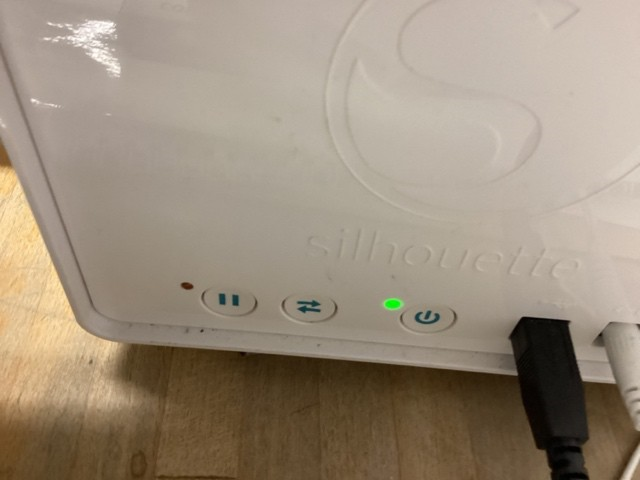
13. If the main light is flashing load the cuttingmattandpushhome.Iflockedpress the middle button and then push home.
14. Like so.
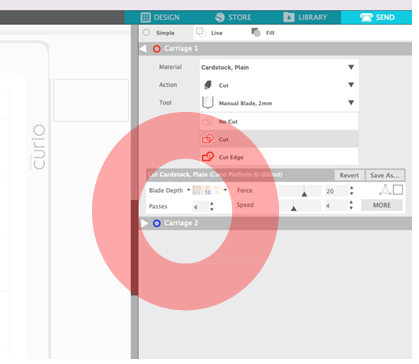
15. BackinSilhouetteStudio.ClickontheSEND Tab.
16. Matchthesesettingsand click SEND
Next Month's Blog will be another Step-By-Step. Featuring teaching basic Photoshop tools.